
6 Essential Music Video Ideas Checklist for Musicians
Explore a practical music video ideas checklist designed for musicians. Discover 6 actionable tips to create engaging YouTube videos and boost your campaigns.
6 Essential Music Video Ideas Checklist for Musicians
Filming a professional music video for YouTube can feel overwhelming, especially when you want your work to stand out. Balancing creativity, tight budgets, and the endless advice out there makes it easy to lose focus on what truly matters. If you want your music video to make a lasting impression, getting clear steps you can rely on is vital.
This guide breaks down practical actions you can take before you ever press record. You’ll learn how to choose the right theme, prepare must-have details, and create a video that matches your unique sound. Discover what really works—from aligning visuals with your music’s mood to using camera angles that tell your story—so you can produce a video viewers remember and share.
Table of Contents
- 1. Choose Your Video Theme Strategically
- 2. Prepare Scenes and Locations in Advance
- 3. Select Camera Angles for Impact
- 4. Plan Simple Visual Effects
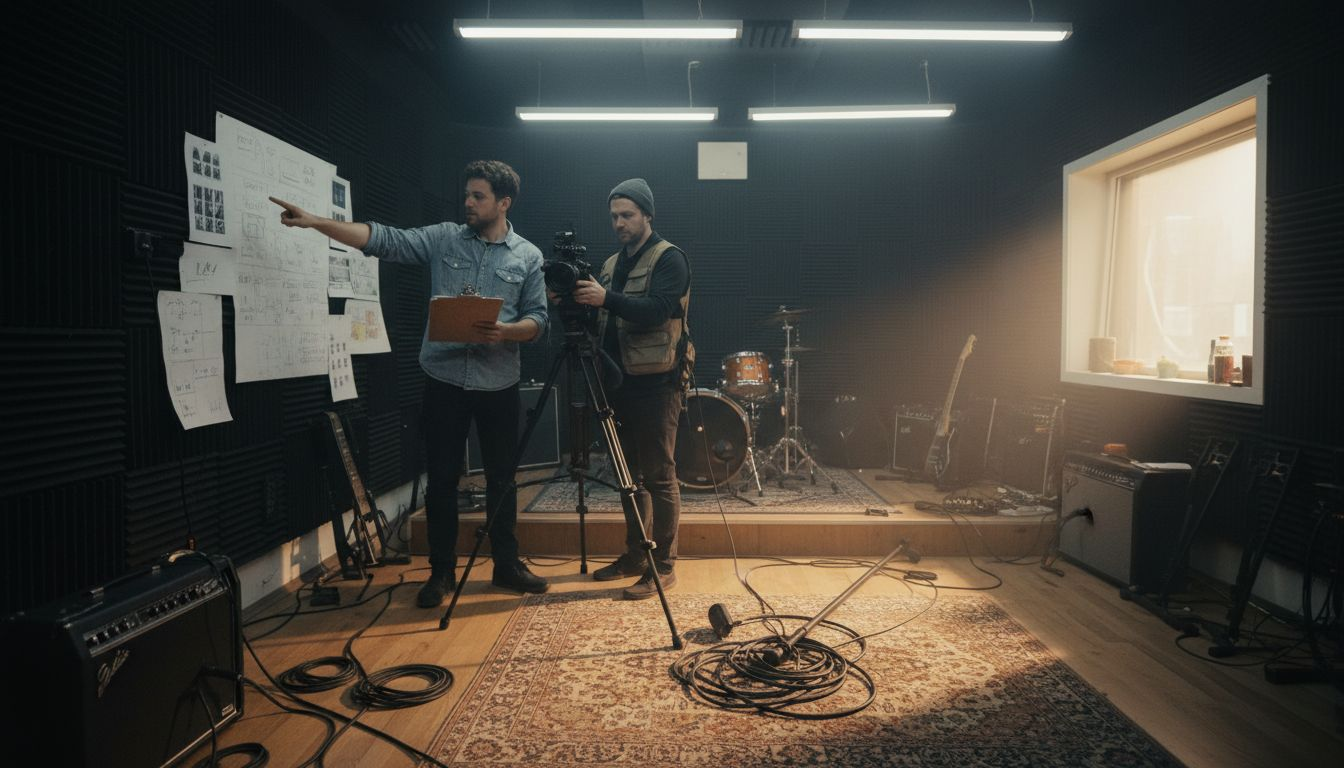
- 5. Create a Storyboard or Shot List
- 6. Integrate Branding and Promotion Elements
Quick Summary
| Key Insight | Explanation |
|---|---|
| 1. Align Theme with Music Emotion | Choose a video theme that resonates emotionally with your song to create a cohesive narrative and enhance viewer engagement. |
| 2. Thoroughly Scout Locations | Prepare by selecting suitable filming locations that reflect your song’s narrative, enhancing visual storytelling and viewer connection. |
| 3. Diverse Camera Angles Matter | Use a variety of camera angles and shot sizes to maintain visual interest and better convey the emotional flow of the song. |
| 4. Plan Simple Visual Effects | Integrate practical or digital effects early in the process to elevate the professionalism of your video without overspending. |
| 5. Create a Detailed Storyboard | Develop a storyboard and shot list to clarify your vision, ensure filming efficiency, and reduce confusion on set. |
1. Choose Your Video Theme Strategically
Your video theme is the foundation that brings your song to life on screen. It’s the visual language that tells your story and connects with viewers emotionally before they even finish the first verse.
The right theme aligns your music and visuals to evoke targeted emotions and support your song’s message. When your visuals match your audio, viewers experience a cohesive, memorable performance that sticks with them long after they click away.
Understanding Your Music’s DNA
Start by identifying what your song actually is. Different music genres and tempos demand different visual approaches:
- Upbeat, energetic tracks thrive with dynamic movement and vibrant environments
- Cinematic, orchestral pieces suit intimate settings and emotional storytelling
- Calm, acoustic songs work beautifully with minimalist visuals and close-ups
- Electronic or experimental music can handle abstract, surreal themes
Aligning mood and pacing strategically enhances audience engagement and emotional impact throughout your video.
Your theme should feel inevitable, not forced. When visuals and music speak the same language, viewers feel it instantly.
Practical Theme Selection
Ask yourself these questions before settling on a direction:
What emotion do you want viewers to feel? Joy, sadness, confidence, vulnerability? Your theme needs to deliver that consistently.
Where does your song take place mentally? A concert stage, a bedroom, a wilderness, an abstract space? Choose a location that makes sense for your narrative.
Who is your audience connecting with? Yourself as the artist, a character, a concept? Your theme should clarify this relationship immediately.
When you film using video advertising strategies for music promotion, remember that theme consistency helps viewers remember your song and builds brand recognition across platforms.
Budget Meets Creativity
Strategic themes work within your actual constraints, not against them. You don’t need elaborate sets or expensive locations. Instead, focus on what creates the right mood with what you have available.
A powerful theme uses lighting, camera angles, and your presence to communicate everything. A bedroom filmed beautifully beats an expensive location filmed poorly.
Pro tip: Test your theme concept by watching music videos in similar genres for five minutes each, then sketch what yours should feel like visually before filming begins.
2. Prepare Scenes and Locations in Advance
Location scouting isn’t glamorous, but it’s absolutely where your video either comes together or falls apart. The right location becomes a visual character in your story, enhancing your song’s narrative and deepening viewer connection.
When you prepare scenes and locations in advance, you reduce on-shoot delays, avoid last-minute scrambling, and ensure visual coherence throughout your video. This preparation transforms a chaotic shoot day into a focused, productive experience.
Why Locations Matter
Your setting communicates tone instantly. A dimly lit warehouse feels gritty and intense. A sun-drenched field feels free and hopeful. A cluttered bedroom feels intimate and confessional. Selecting locations that complement your song’s narrative ensures the aesthetic resonates with your message.
The best locations aren’t always the most expensive ones. They’re the ones that feel true to your song’s story.
Locations act as visual storytelling tools. They support your lyrics without competing with your performance. This is crucial when you’re uploading to YouTube and competing for attention in those first three seconds.
The Scouting Process
Start by brainstorming locations that match your song’s mood and theme. Write down 5 to 10 possibilities, ranging from realistic to ambitious.
Visit each location at the time of day you plan to film. Natural light changes dramatically between morning, afternoon, and evening. You want to see exactly what you’re working with.
Consider these practical factors:
- Accessibility for you and any crew members
- Noise levels during your filming window
- Lighting conditions and shadow patterns
- Permission requirements or fees
- Weather patterns and seasons
- Background distractions or visual clutter
Pre-planning scenes around secured venues reduces scheduling conflicts and prevents wasted time on shoot day.
Getting Permission
If you’re filming in public spaces, ask permission from property owners or managers. Many location owners are thrilled to support creative projects, especially if you explain you’re promoting music on YouTube.
For private locations, clarify filming dates, duration, and any equipment you’ll bring. Written confirmation prevents misunderstandings.
Create a Location Checklist
Once you’ve decided on your locations, document everything:
- Exact address and access instructions
- Best parking options
- Power outlet availability
- Backup indoor locations if weather turns bad
- Contact person and phone number
- Filming permit details or permission dates
- Equipment restrictions or safety concerns
This document becomes your production bible for shoot day.
Pro tip: Scout locations twice: once during daylight with a friend to assess practicality, and once more at your planned filming time to confirm lighting and sound conditions.
3. Select Camera Angles for Impact
Camera angles are your invisible storytellers. They control what viewers focus on, how they feel about your performance, and what story your video communicates. The wrong angle undermines your song. The right angle makes it unforgettable.
Every angle choice you make shapes audience perception and emotional response. Whether you’re filming close-ups or wide shots, mastering shot sizes and framing techniques determines how dynamic and engaging your video becomes.
Understanding Shot Sizes
Different shot sizes serve different purposes in your video. Think of them as a toolkit for visual storytelling.
Wide shots establish context and show the full environment. Use these at the beginning or during instrumental breaks to orient viewers.
Medium shots frame you from the waist up. This is your workhorse angle, perfect for verses where viewers need to connect with your face and upper body movement.
Close-ups capture facial expressions and emotion. These moments hit hardest during emotional peaks or the chorus when your lyrics demand intimate connection.
Beyond Size, Think Direction
Camera angles communicate character power and emotional tone through positioning. Low angles shoot upwards, making you appear powerful and commanding. High angles shoot downwards, creating vulnerability or introspection.
Frontal angles face you directly at the camera, building direct connection with viewers. Profile shots show your side, creating distance or storytelling separation. Three-quarter angles blend both worlds, feeling natural and engaged.
Consider your song’s emotional arc:
- Verses that feel vulnerable benefit from closer angles and softer positioning
- Choruses demand power, so low angles and wider shots work better
- Bridges can shift perspective entirely to signal emotional change
- Breakdowns work beautifully with extreme close-ups on your eyes or hands
Creating Dynamic Flow
Variety keeps viewers engaged. A video shot entirely in one angle becomes boring, no matter how good you sound. Switching between shot sizes and angles maintains visual momentum.
Plan angle transitions around your song’s structure. Change angles every 15 to 30 seconds to prevent visual fatigue. Match transitions to musical moments where the energy naturally shifts.
The best camera angles make viewers feel what you’re singing before they consciously realise why.
Pro tip: Film the same section from three different angles during one location shoot, then edit them together to create visual variety without reshooting.
4. Plan Simple Visual Effects
Visual effects sound intimidating, but they don’t require Hollywood budgets or advanced software expertise. Simple effects planned strategically can elevate your music video from amateur to professional looking.
The key is planning effects early, not adding them as afterthoughts. When you define your concept and desired effects before filming, you avoid overspending and ensure effects enhance rather than distract from your performance.
Practical Effects vs Digital Effects
You have two main options: practical effects created on set, or digital effects added during editing. Both work beautifully when planned properly.
Practical effects happen in front of the camera. Think coloured smoke, lighting changes, costume reveals, or deliberate camera movements. These require no post-production work and look authentic on screen.
Digital effects happen after filming during editing. This includes using chroma key, compositing, and colour grading techniques. Digital effects offer flexibility and creativity without on-set complexity.
Planning Your Effects
Defining your concept and budget early helps avoid overspending on visual effects. Write down which scenes need effects and what you’re trying to achieve emotionally.
Create a shot list detailing exactly where effects appear. This document becomes your reference during filming and editing, ensuring coordination between production and post-production.
Consider these affordable, high-impact options:
- Coloured or atmospheric lighting changes
- Simple transitions between scenes
- Slow motion or speed ramps at emotional moments
- Text overlays or typography
- Colour grading to match mood shifts
- Basic green screen backgrounds
- Light leaks or lens flares
Budget Smartly
Not every moment needs effects. Strategic placement matters more than quantity. A single impactful effect during your chorus lands harder than five mediocre ones scattered throughout.
Starting with simple effects keeps costs low and production manageable. As you grow, you can layer complexity.
The best visual effects are invisible to the viewer. They feel inevitable, not added on.
Storyboarding Effects
Sketch or describe every effect scene before filming. This planning reduces costly changes and improves communication if you’re working with editors or post-production teams.
Note timing, duration, and how each effect serves the song’s narrative. Effects should support your lyrics and music, never compete with them.
Pro tip: Start with just one simple effect per music video to master the process, then add complexity in future projects.
5. Create a Storyboard or Shot List
A storyboard or shot list transforms your vision from abstract idea into a concrete filming blueprint. Without one, you’ll waste precious time on set deciding what to film instead of actually filming it.
These tools translate your song and concept into specific visual sequences, specifying camera angles, shot types, and movements. They communicate your vision clearly to anyone helping with production and keep you focused during filming.
Storyboards vs Shot Lists
Both tools serve complementary purposes. A storyboard uses sketches and notes to show narrative flow and visual storytelling. You don’t need artistic talent here, just clarity. Simple stick figures and rough drawings work perfectly.
A shot list details each individual camera shot with type, lens, angle, and subject. It reads like a practical guide that you reference during filming, checking off shots as you complete them.
Many musicians use both. The storyboard shows the overall story, whilst the shot list provides technical specifics for execution.
Building Your Storyboard
Creating a detailed storyboard translates music into visual sequences matching your song’s pacing and rhythm. Start by breaking your song into sections: verse one, chorus, verse two, bridge, final chorus.
For each section, sketch 3 to 5 key moments that happen on screen. Draw rough frames showing camera position, your placement, and main action. Add brief notes about mood, movement, or effects.
This process forces you to think visually about every moment of your song.
Creating Your Shot List
A shot list includes shot type, lens choice, angle, and subject for each camera shot. This level of detail prevents confusion during filming.
Organise by location first, then by shot. When you’re filming at one location, you want all shots from that location grouped together to save time and energy.
Include this information for each shot:
- Shot number (1, 2, 3, etc.)
- Scene or song section (verse, chorus)
- Shot type (wide, medium, close-up)
- Camera angle (eye level, low, high)
- Duration in seconds
- Special notes (handheld, slow motion, effects)
Practical Benefits
These tools eliminate on-set confusion and reduce reshoots. Your crew understands exactly what you need. You stay organised and focused despite fatigue.
A five-minute storyboard saves two hours of chaotic filming decisions.
Your storyboard also reveals pacing issues before filming starts. If your chorus has five identical medium shots, you’ll spot that now and adjust. Boring footage costs you viewers on YouTube.
Pro tip: Use your phone to photograph your storyboard sketches and create a digital reference guide you can check during filming.
6. Integrate Branding and Promotion Elements
Your music video is a promotional asset. It’s not just entertainment, it’s your chance to build brand recognition and drive viewers towards your music. Strategic branding makes your video instantly recognisable and shareable.
Integrating branding doesn’t mean cluttering your video with logos. It means weaving your identity throughout every frame so viewers remember you long after they click away.
Building Visual Consistency
Crafting a distinct visual identity with cohesive colour palettes, font styles, and imagery creates immediate recognition across your entire brand. Your music video should feel like it belongs in your world.
Choose 2 to 3 colours that represent your music. Use them consistently in clothing, backgrounds, graphics, and overlays. When fans see those colours elsewhere, they’ll think of you.
Select one or two fonts for any text elements. Stick with them across your video, thumbnails, and social media. Consistency builds brand authority.
Strategic Promotional Placement
Include your artist name or logo in ways that feel natural, not forced. Consider these approaches:
- Subtle watermarks in lower corners during performance sections
- Text overlays that appear during instrumental breaks
- Your name displayed on clothing or props within the story
- Branding at the video’s end before your call to action
- Your song title and artist name in graphics during chorus moments
Don’t overcomplicate it. Your performance is your strongest branding tool. Let that shine first.
Linking to Your Campaign
Your video connects viewers to your broader promotional strategy. Include clear calls to action that direct people where you want them to go.
Consider adding text overlays with your social media handles or music streaming links. YouTube’s end screens and cards allow clickable elements that send viewers to your next song, playlist, or website.
If you’re running paid advertising with your video, consistency between video branding and ad visuals increases conversion rates significantly. A viewer who recognises your brand across multiple touchpoints is far more likely to stream your music.
Authentic Branding
The most effective branding feels effortless because it reflects who you actually are.
Don’t force a brand identity that doesn’t match your music. Your visual style should feel authentic to your artistry. Viewers recognise forced branding and it undermines trust.
Your personality, values, and aesthetic should shine through naturally. That’s what makes your video memorable and shareable.
Pro tip: Create a simple one-page brand guide with your chosen colours, fonts, and key visual elements to reference during production and editing.
Below is a comprehensive table summarising the strategies and key recommendations discussed throughout the article “Creating an Impactful Music Video: A Comprehensive Guide”.
| Topic | Key Recommendations | Key Outcomes |
|---|---|---|
| Selecting Themes | Align the visual theme with the music’s emotions and narrative. Consider the genre and pace of the music. | Creates a cohesive and memorable viewer experience. |
| Planning Locations | Scout locations that fit the song’s mood and pre-organise logistics. Ensure permission is obtained where needed. | Reduces on-set delays and enhances visual storytelling. |
| Choosing Camera Angles | Use varied shot sizes and angles strategically to convey emotion and narrative. Plan transitions based on the song structure. | Increases viewer engagement and emotional resonance. |
| Incorporating Visual Effects | Plan simple and meaningful effects during pre-production to enhance the video without overshadowing the narrative. | Elevates video production quality while maintaining cost efficiency. |
| Storyboarding and Shot Listing | Create visual sketches or detailed shot lists to organise filming sequences and ensure concept clarity. | Reduces filming uncertainties and improves pacing alignment. |
| Branding Integration | Employ consistent visual elements like colours, fonts, and logos subtly across the video and promotional material. | Strengthens brand recognition and promotes shareability. |
Transform Your Music Video Ideas Into Reality Effortlessly
Creating a compelling music video can seem overwhelming when faced with endless decisions about themes, locations, and camera angles as highlighted in the “6 Essential Music Video Ideas Checklist for Musicians”. You want your video to connect emotionally, maintain visual consistency, and promote your brand authentically but struggle with coordinating all the pieces efficiently and effectively. Key challenges include strategic theme selection, location preparation, and integrating branding while keeping production manageable and your budget intact.
That is where Music Video Marketplace steps in. Our platform empowers musicians to create professional long form videos in minutes, ready to upload to YouTube and launch an impactful ad campaign for your song. By simplifying complex production steps mentioned in the article, such as storyboarding and visual effect planning, we help you maintain creative control without the stress of traditional shoots. Discover how to match your music’s mood with dynamic visuals and streamlined promotion effortlessly. Learn more about how to harness video advertising strategies for music promotion and get started now.
Take charge of your music video creation today. Visit Music Video Marketplace and turn your ideas from concept into an engaging video that resonates with your audience and grows your brand immediately.
Frequently Asked Questions
How do I choose the right video theme for my music?
Choosing the right video theme involves identifying the emotion and narrative your song conveys. Consider your song’s genre and tempo to align visuals with the intended mood, then brainstorm options that enhance your message.
What should I consider when scouting locations for my music video?
When scouting locations, focus on accessibility, lighting conditions, and background distractions. Take notes on each potential site, including any necessary permissions, to streamline the filming process.
How do I determine the best camera angles for filming?
To determine the best camera angles, think about the emotional tone of each section of your song. Use a mix of wide, medium, and close-up shots to keep your video dynamic and engaging, while also planning transitions that match the song’s energy.
What types of visual effects should I include in my music video?
Incorporate practical effects, like coloured lighting or slow-motion shots, to enhance emotional moments without overwhelming the footage. Plan these effects early to ensure they align with your overall vision and narrative.
Why is it important to create a storyboard for my music video?
Creating a storyboard helps visualise each scene and ensures a coherent narrative flow throughout your video. This planning reduces confusion on set, allowing you to focus on filming effectively and efficiently.
How can I integrate branding into my music video?
Integrate branding by using consistent colours, fonts, and visuals throughout your video. Subtly include your artist name or logo in a way that feels natural, reinforcing your identity without detracting from your performance.
Recommended
Read next
 Music Video Loudness on YouTube: What Level to Aim ForMaster your song to about -14 LUFS with true peak at -1 dBTP, learn how YouTube turns loud audio down, and check your upload with Stats for nerds.
 Music Video Production Guide for Musicians on YouTubeDiscover a step-by-step music video production guide for artists. Learn to prepare, create, edit, and launch engaging videos for YouTube and campaigns.
 Music Video Production Workflow for YouTube SuccessFollow this music video production workflow to efficiently create, edit, publish, and promote your long-form music video on YouTube for maximum impact.
 Music Video File Naming: A Practical Guide for ArtistsHow to name music video files for Vevo, YouTube and distributors: a clear format, version tags, folder structure and mistakes to avoid, with examples.
Turn the idea into a finished music video.
Drop your track into the Studio and build your visual in minutes.