
How to create song visuals: a 2026 guide
Learn how to create song visuals in this 2026 guide. Engage listeners with stunning animations and boost your music's reach effectively!
How to create song visuals: a 2026 guide
TL;DR:
- Creating platform-specific song visuals using accessible tools like CapCut or Rotor Videos enhances listener engagement and streamlines the production process. Proper project setup, including correct aspect ratios and export settings, prevents technical issues and ensures seamless looping across platforms. Careful tuning of audio-reactivity and focus on mood matching establish professional-quality visuals that support the music’s emotional impact.
Song visuals are purpose-built moving images, loops, or animated sequences that accompany a track across platforms like Spotify, YouTube, Instagram, and TikTok to deepen listener engagement and extend a song’s reach. Knowing how to create song visuals is no longer optional for musicians who want their music discovered. Platforms reward content that keeps viewers watching, and a well-crafted visual does exactly that. Tools like Spotify Canvas, Magic Music Visuals, and CapCut have made professional-quality output achievable without a film crew or a large budget. This guide walks you through every stage, from selecting the right software to exporting a polished final file.
What tools do you need to create song visuals?
The tool you choose determines your ceiling, your learning curve, and your cost. Start with CapCut or Rotor Videos before moving to After Effects when you need greater control. That principle holds in 2026 as firmly as ever. Beginning with a template-based editor keeps your output consistent while your skills develop, and it prevents the paralysis that comes from opening a node-based program on day one.
Here is a clear breakdown of the main options:
- CapCut (free, mobile and desktop): template-driven, excellent for short social clips and Spotify Canvas loops. No prior editing knowledge required.
- Canva (free and paid tiers): strong for animated cover art and lyric videos. Limited audio-reactivity but fast to produce.
- Rotor Videos (subscription): designed specifically for musicians. Uploads your track and auto-generates a cut-to-beat video from footage libraries.
- Magic Music Visuals (paid, desktop): node-based audio-reactive workflow for complex, real-time visuals. Steep learning curve, exceptional output.
- Adobe After Effects (subscription): industry standard for motion graphics. Requires skill but offers total creative control.
- Vizzy (free browser tool): lightweight visualiser builder ideal for YouTube uploads and quick audio-reactive loops.
| Tool | Ease of use | Cost | Audio-reactive | Best platform |
|---|---|---|---|---|
| CapCut | Beginner | Free | No | TikTok, Instagram, Spotify |
| Canva | Beginner | Free/Paid | No | Instagram, YouTube |
| Rotor Videos | Beginner | Subscription | Partial | YouTube, Social |
| Vizzy | Intermediate | Free | Yes | YouTube |
| Magic Music Visuals | Advanced | Paid | Yes | Live, YouTube |
| After Effects | Advanced | Subscription | With plugins | All platforms |
Pro Tip: If you are releasing frequently, pick one beginner tool and master it fully before adding a second. Consistency of output beats occasional brilliance.
How do you set up your project for each platform?
Getting your project settings wrong at the start costs you time at the end. Every platform has its own technical requirements, and designing for the wrong dimensions means cropping, stretching, or rejection on upload.
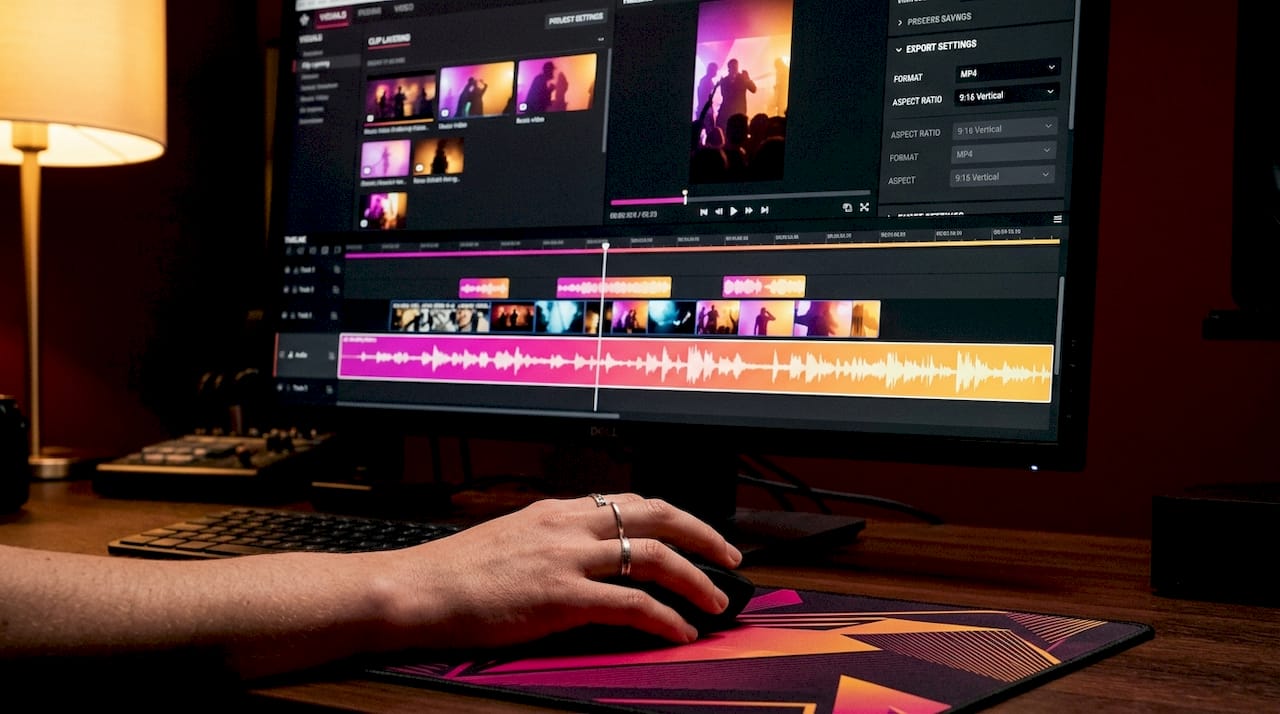
Spotify Canvas assets must be vertical 9:16 looping videos between 3 and 8 seconds, exported as MP4 without audio. That last point catches many creators off guard. The Canvas plays silently while Spotify streams the audio separately, so any audio baked into your export is stripped out anyway. The minimum resolution is 720px tall, and the video loops automatically, so your start and end frames must match seamlessly.
| Platform | Aspect ratio | Duration | Format | Notes |
|---|---|---|---|---|
| Spotify Canvas | 9:16 | 3 to 8 seconds | MP4 (no audio) | Seamless loop required |
| YouTube visualiser | 16:9 | Full track length | MP4 H.264 | 1080p minimum recommended |
| Instagram Reels | 9:16 | 15 to 90 seconds | MP4 | Hook in first 3 seconds |
| TikTok | 9:16 | 15 to 60 seconds | MP4 | Caption-safe zone critical |
| Instagram feed | 1:1 or 4:5 | Up to 60 seconds | MP4 | Square crops well on grid |
Creating different platform versions with adjusted aspect ratios and durations improves reach and engagement across channels. That means a single visual concept can be repurposed into a Spotify Canvas, a YouTube visualiser, and a TikTok clip with minimal extra work if you plan your canvas size before you start.
Pro Tip: Design your core visual at 1080×1920 (9:16) first. Cropping down to 1:1 or 16:9 is straightforward. Scaling up from a small square is not.
Key setup considerations before you press play:
- Set your frame rate to 24fps or 30fps depending on the mood. 24fps reads as cinematic; 30fps reads as clean and modern.
- Use guides or safe zone overlays to keep key elements away from UI elements like the Spotify progress bar or TikTok caption area.
- Name your project files with the platform and version in the filename from the start. Confusion at export is avoidable.
Step-by-step: how to build audio-reactive song visuals
Audio-reactive visuals respond to your music in real time, making them feel alive in a way that static loops cannot. The process is more structured than it looks.
- Import your track. Load your audio file into Magic Music Visuals or Vizzy. Both accept WAV and MP3. WAV is preferable for accuracy.
- Add an audio analyser node. In Magic Music Visuals, this is a spectrum or waveform analyser. Route its output to a visual parameter such as scale, rotation, or colour intensity.
- Load a shader. Libraries like isf.video provide shaders that can be tweaked in Magic Music Visuals rather than built from scratch. Choose one that matches your genre’s energy.
- Tune sensitivity and smoothing. Increasing smoothing or lowering sensitivity on audio analysers improves visual fluidity and viewer experience. A jittery visual reads as amateur regardless of how good the underlying design is.
- Map to musical structure. Most tools sync only to loudness. Advanced tools analyse BPM, energy curves, and song sections for pacing and scene changes rather than just volume triggers. If your tool supports BPM mapping, use it.
- Preview in loop mode. Watch your visual on repeat for at least two full minutes. Fatigue points and jarring transitions become obvious quickly.
- Render a test export. Export a short clip and view it on your phone before committing to a full render. Colours and motion read differently on mobile screens.
If audio-reactive tools feel too complex right now, animated cover art is a legitimate and effective alternative. Take your album artwork, apply a slow zoom or a subtle particle overlay in CapCut or Canva, and export as an MP4. Matching the energy and mood of your visuals to your music genre enhances listener engagement and avoids cognitive dissonance. A slow zoom on a painterly album cover works beautifully for an acoustic track. It would feel flat under a drum and bass release.
Pro Tip: For Spotify Canvas specifically, a cinemagraph approach works brilliantly. Keep most of the image static and animate only one element, such as smoke, water, or blinking lights. The restraint reads as intentional and professional.
How do you edit and export song visuals correctly?
Export settings are where good visuals go wrong. The most common errors are incorrect codecs, oversized files, and audio accidentally baked into a Canvas export.
Follow these export rules without exception:
- Codec: MP4 with H.264 encoding for all platforms. H.265 offers better compression but is not universally accepted.
- Resolution: 1080×1920 for vertical (9:16); 1920×1080 for horizontal (16:9). Do not export at 720p if you can avoid it.
- Frame rate: Match your project frame rate. Do not change it at export.
- Audio: Mute or remove audio entirely for Spotify Canvas exports. For YouTube and social, include your mastered track at the correct level.
- File size: Spotify Canvas accepts files up to 200MB. Keep well below this for faster upload and processing.
Centre key visual elements to avoid cropping by device-specific UI overlays and to achieve seamless looping. The safe zone on a 9:16 Canvas is roughly the central 80% of the frame. Anything near the edges risks being obscured by the Spotify interface on certain handsets.
Pro Tip: Preview your loop by playing the exported file in VLC or QuickTime set to repeat. Watch the join point carefully. A single frame of black or a visible cut will break the illusion entirely.
What are the most common mistakes when making song visuals?
Most problems in song visual creation fall into a small number of repeatable categories. Knowing them in advance saves hours of rework.
The single most damaging mistake is designing at the wrong aspect ratio. A 16:9 visual uploaded to Spotify Canvas will be stretched, cropped, or rejected. Check your canvas dimensions before you place a single element.
Critical do’s and don’ts:
- Do create separate versions for each platform rather than forcing one file to work everywhere.
- Do test your visual on at least two different devices before publishing.
- Do keep your visual loop under 8 seconds for Spotify Canvas, even if your tool allows longer.
- Don’t use rapid flashing effects. They cause viewer discomfort and may violate platform accessibility policies.
- Don’t overcrowd the frame with text, logos, and motion simultaneously. One focal point per visual is the professional standard.
- Don’t rely solely on loudness for audio-reactivity. Visuals that only pulse on the beat become monotonous within 30 seconds.
Jittery audio-reactive visuals are the second most common complaint from musicians new to the format. The fix is almost always the same: raise the smoothing value in your audio analyser settings and reduce sensitivity until the motion feels fluid rather than twitchy. This is a key professional skill that separates polished output from amateur attempts.
Key takeaways
Effective song visuals require correct platform specifications, genre-matched aesthetics, and properly tuned audio-reactivity to achieve professional results.
| Point | Details |
|---|---|
| Match platform specs exactly | Spotify Canvas requires 9:16, 3 to 8 seconds, MP4 without audio. Wrong specs mean rejection. |
| Start with accessible tools | CapCut and Rotor Videos build skills before you commit to After Effects or Magic Music Visuals. |
| Tune audio-reactivity carefully | Raise smoothing and lower sensitivity to eliminate jitter and achieve fluid, professional motion. |
| Create platform-specific versions | One visual concept can serve Spotify, YouTube, and TikTok with adjusted ratios and durations. |
| Centre key elements in safe zones | Keep focal points in the central 80% of the frame to avoid UI cropping on all devices. |
What I have learned from years of working with song visuals
The advice I give most often is the advice most people ignore: match your visual intensity to your music before you match it to a trend. I have watched musicians spend days building elaborate glitch-art visuals for a folk EP because glitch was popular that month. The result was a visual that fought the music rather than supported it. Listeners felt the friction even if they could not name it.
My personal workflow starts with the mood of the track, not the tool. I ask what the music feels like physically. Is it expansive or claustrophobic? Fast or suspended? The answer dictates whether I reach for a slow zoom on a still image or a full audio-reactive shader sequence. Genre matters, but mood is more precise.
I also test everything on a phone screen before I consider anything finished. Desktop monitors are forgiving. A 6-inch screen in a bright room is not. Colours that look rich on a calibrated monitor can look muddy on a phone. Motion that reads as subtle on a large screen can disappear entirely on a small one. The visualiser guide for musicians I return to most often reinforces this point: the platform your listener uses is the only screen that matters.
One more thing. Do not wait for the perfect visual before you release. A clean, well-formatted animated cover art uploaded on release day beats a complex audio-reactive masterpiece that arrives three weeks late. Momentum in music promotion is perishable.
— Music
How Musicvideomarketplace can help you launch faster
Creating a polished song visual is only half the work. Getting it in front of listeners is the other half, and that is where most musicians lose momentum.

Musicvideomarketplace is built specifically for this problem. The platform lets you create a long-form video in minutes and upload it directly to YouTube, then build an ad campaign around your song without switching between five different tools. Whether you are releasing your first single or your tenth album, the workflow is the same: upload your track, generate your visual, and launch your campaign. Visit Musicvideomarketplace to see how quickly you can go from finished track to live promotion. For a deeper look at which creation tools suit your current skill level, the best video creation tools guide on the blog is a strong starting point.
FAQ
What is a song visual?
A song visual is a looping video or animated sequence created to accompany a music track on platforms like Spotify, YouTube, or Instagram. It replaces static artwork with moving imagery to increase engagement and streaming time.
How long should a Spotify Canvas be?
Spotify Canvas videos must be between 3 and 8 seconds long, formatted as a vertical 9:16 MP4 without audio. The video loops automatically while the track plays.
Do I need expensive software to make song visuals?
No. Tools like CapCut and Canva are free and produce professional results for Spotify Canvas and social clips. Advanced audio-reactive visuals benefit from Magic Music Visuals or After Effects, but these are not necessary for most releases.
How do I stop my audio-reactive visual from looking jittery?
Increase the smoothing value and reduce the sensitivity on your audio analyser settings. This is the standard fix in tools like Vizzy and Magic Music Visuals, and it produces noticeably smoother, more professional motion.
Can I use one visual for all platforms?
One concept can work across platforms, but you need separate versions with adjusted aspect ratios and durations. A 9:16 Spotify Canvas, a 16:9 YouTube visualiser, and a 9:16 TikTok clip are three distinct exports from the same source material.
Recommended
- What is a visualiser video? Essential guide for musicians 2026 | Music Video Marketplace Blog
- Examples of video content for musicians in 2026 | Music Video Marketplace Blog
- Créer un visuel attractif pour musique sur YouTube | Music Video Marketplace Blog
- Creative video content ideas for producers: boost music promotion | Music Video Marketplace Blog
Read next
 How to storyboard song videos: a practical guideMaster how to storyboard song videos to save time and costs. Create a clear, effective plan that boosts your music video production today!
 How to write music video scripts: a practical guideLearn how to write music video scripts that transform songs into visual stories. Master the art of crafting compelling AV scripts today!
 Inside Loraa White’s Vintage Country Creative OfficeLoraa White’s newly redecorated office in Dromore, Co. Down captures her love of creativity, upcycling, and countryside charm. With vintage furniture, rich colours, and DIY touches, it’s the perfect cosy space for music video shoots and content creation.
 How to create looping videos for musicians (2026 guide)Discover how to create looping videos for musicians with our 2026 guide. Learn techniques, platform specs, and tips for captivating loops.
Turn the idea into a finished music video.
Drop your track into the Studio and build your visual in minutes.