
How to create looping videos for musicians (2026 guide)
Discover how to create looping videos for musicians with our 2026 guide. Learn techniques, platform specs, and tips for captivating loops.
How to create looping videos for musicians (2026 guide)
TL;DR:
- Planning and precise editing are essential for creating seamless musical loops that hide transitions effectively.
- Platform-specific exports and license clearance ensure quality and legal compliance for distribution and commercial use.
Plan overlapping action, lock your loop length to whole musical bars, trim on downbeats, and export per platform specs. That is the entire method in one sentence. Do it yourself in Adobe Premiere Pro, DaVinci Resolve, Final Cut Pro, After Effects, Canva, or CapCut, or brief Musicvideomarketplace to deliver a ready-to-publish loop with a commercial licence.
Quick-start checklist:
- Storyboard overlapping action so the last frame leads visually into the first
- Measure BPM, then size loops to whole bars (1, 2, or 4 bars)
- Shoot or generate clips 1–2 seconds longer than the slot, then trim to downbeats
- Apply a 50–100 ms crossfade on the seam if a visual jump remains
- Export a lossless master (ProRes or DNxHR), then repack per platform: 9:16 MP4 for Spotify Canvas with a short loop duration, vertical H.264 for TikTok and Reels, horizontal for YouTube.
For a Spotify Canvas brief, specify loop length (3–8 seconds), aspect ratio (9:16), and confirm you hold a commercial sync licence before upload.
Table of Contents
- How to create looping videos for musicians: plan and storyboard first
- What shooting and composition choices make looping easier?
- Editing techniques that produce a truly seamless loop
- How to extract loops from existing footage without re-shooting
- Platform export rules and presets for UK musicians
- How to QA a loop and fix the common problems
- Commissioning a ready-made loop: costs, timelines, and what to brief
- Rights, licences, and UK release checks for commercial use
- How Musicvideomarketplace handles loopable videos
- Audio looping integration for musicians’ videos
- Syncing video loops with live performance or audio tracks
- Key takeaways
- What actually works for musicians making loops in 2026
- Ready-made and custom loopable videos from Musicvideomarketplace
How to create looping videos for musicians: plan and storyboard first
The storyboard stage is where most loops are won or lost. Overlapping action means the motion at the end of your clip continues naturally into the start, so the viewer’s eye never registers a reset.
Start by measuring your track’s BPM. Drop the audio into your editor’s clip inspector or a free BPM-detector site. From there, whole-bar durations are your building blocks: at 120 BPM, one bar is approximately two seconds, two bars about four seconds, four bars about eight seconds. Never plan a 1.5-bar loop. Off-grid durations are what make an edit feel almost right but never quite there.
Storyboard template per loop asset:
- Loop ID and intended platform designation (Canvas, Reel, long-form cut)
- Start and end frame descriptions ensuring visual continuity
- Downbeat marker position
- Visual phase note (e.g. camera pan 0°→90°, particle burst, colour shift)
- Intended duration in bars and seconds
Pro Tip: Build a small library of 1-bar, 2-bar, and 4-bar assets from the same footage. Chaining loops from a shared visual set keeps colour and motion phase consistent across every platform cut.
What shooting and composition choices make looping easier?
Choose motion that naturally repeats: a steady push, a continuous pan, or a cyclic action. Lock your camera settings before rolling so exposure and white balance never flicker across the loop seam.
Practical rules:
- Use a tripod or gimbal for controlled, repeatable motion
- Shoot at the common delivery frame rates for social platforms, such as 24 to 30 fps; higher frame rates can be used if fine frame editing is planned in post-production.
- Frame with extra lead room so you can match motion phase precisely at the edit point
- Capture 1–2 seconds extra at both ends as trim headroom
For editing, the main tools musicians reach for are Adobe After Effects (morphs and frame-stitching), Adobe Premiere Pro and Final Cut Pro (timeline beat markers and quick trims), DaVinci Resolve (colour grading and beat detection), Canva (animated cover art and Canvas-ready templates), and CapCut (auto beat detection and vertical presets). A comparison of these tools is worth reading before you commit to a workflow.
Editing techniques that produce a truly seamless loop
Snap trims to downbeats, match motion phase between the first and last frames, and hide any remaining seam with a beat-aligned micro-crossfade of 50–100 ms. Pros rarely feel sync; they measure it by placing downbeat markers and snapping clips to those markers.
Step-by-step editing checklist:
- Import the track and mark every downbeat in your NLE timeline
- Create a loop asset sized to your chosen bar count
- Trim the start and end precisely on beat markers
- Check that the first and last frames match in motion phase and luminance
- Repeat playback 10–20 times at delivery frame rate
- Apply a 50–100 ms micro-crossfade on the seam if a visual jump remains
- Export a lossless master (ProRes or DNxHR), then repack for each platform
Software specifics: Premiere Pro, Final Cut Pro, and DaVinci Resolve all handle timeline beat markers well. After Effects is the right tool for morphs and frame-stitching when a hard cut will not disguise the seam. Canva and CapCut cover simpler animated cover art and quick Canvas-ready exports without a steep learning curve.
For AI-generated clips, produce each shot 1–2 seconds longer than the slot requires, then trim to the bar. That extra headroom gives you a clean frame on both sides of the cut.
How to extract loops from existing footage without re-shooting
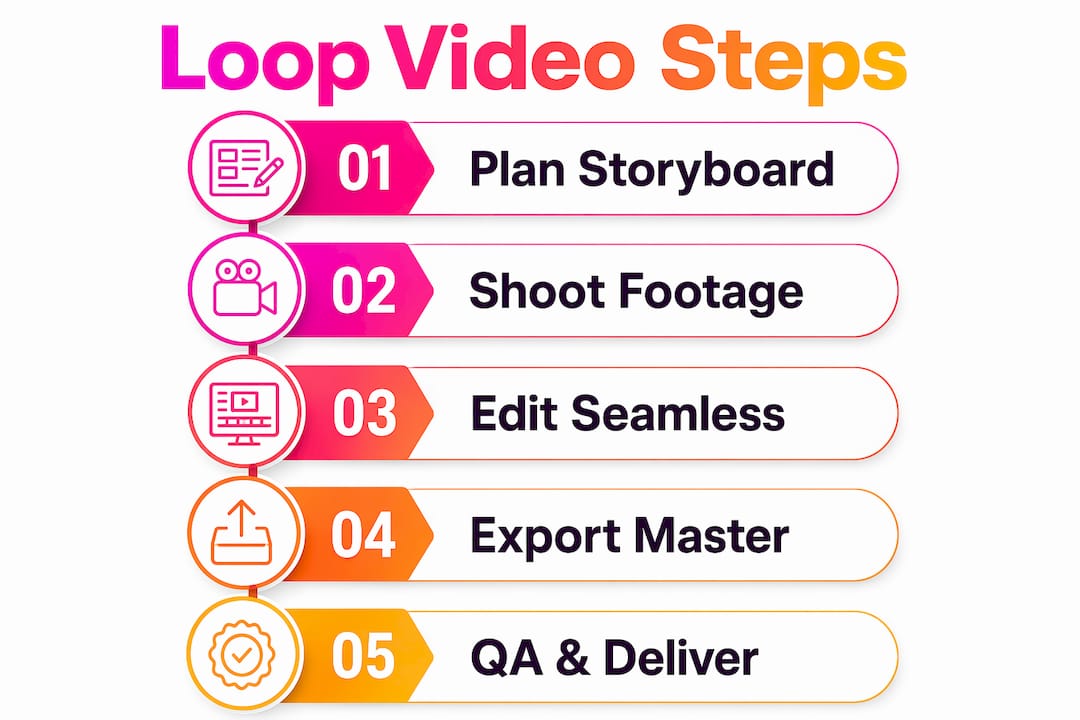
Scan your existing footage for continuous-motion windows, identify segments where the camera or subject moves without interruption, and trim them to whole-bar durations using beat markers. You rarely need to re-shoot.
Practical workflow:
- Scan footage for continuous-motion frames lasting at least your target loop duration plus 2 seconds
- Export a master clip with 1–2 seconds of headroom on each end
- Place on the timeline with downbeat markers active
- Cut accent clips and background loops aligned with whole bar durations from the same master
- Use match cuts (action-phase matching) between disparate clips to hide scene changes
- If imagery differs too much, apply a single LUT across all clips to unify the look
A consistent colour grade does more to sell visual continuity than any transition effect. One LUT applied globally is faster and more convincing than clip-by-clip colour correction.
Platform export rules and presets for UK musicians
Export a lossless master first, then create platform-specific repacks. Lossless masters (ProRes or DNxHR) protect quality and preserve your options for future licensing edits.
For Spotify Canvas, abstract and atmospheric visuals outperform narrative or lip-sync content because Canvas repeats independently of playback position. A story that loops every six seconds becomes distracting fast.
| Platform | Aspect ratio | Duration | Codec | Notes |
|---|---|---|---|---|
| Spotify Canvas | 9:16 | short duration suitable for looping | MP4/M4V, 24–30 fps | Confirm current file-size limits in Spotify for Artists before upload |
| Instagram Reels | 9:16 | Up to 90 s | H.264, 1080×1920 | Keep under platform size limits; caption safe zones apply |
| TikTok | 9:16 | Up to 60 s (standard) | H.264, 1080×1920 | Check current duration limits; they update regularly |
| YouTube Shorts | 9:16 | Up to 60 s | H.264 or H.265, 1080×1920 | Title card within safe zone |
| YouTube long-form | 16:9 | Any | MP4 video, 1080p or higher | Use ProRes master for re-encode; target –14 LUFS for loudness |
For Canvas automation, community FFmpeg scripts can apply a controlled crossfade seam and verify file size against platform limits before you upload.
How to QA a loop and fix the common problems
Repeat playback multiple times at delivery frame rate. Watch for a visual phase jump, a luminance shift, or an audio drift. Those three issues cover the vast majority of loop failures.
QA checklist:
- Repeat playback test (10–20 cycles minimum)
- Check colour and brightness consistency across the seam
- Confirm frame rate and audio sample rate match the master
- Verify audio sync when the loop is used inside a long-form version
- Confirm platform file-size and format requirements are met
Troubleshooting:
- Visual click or jump: try a 20–50 ms crossfade at the seam
- Audio drift: check exported frame rate; use tempo-aware timewarp if needed
- Colour shift across the seam: apply a single LUT to all clips before export
Pro Tip: Export a test encode at delivery settings and watch it on your phone before final delivery. Platform compression can introduce artefacts that are invisible on a desktop monitor.
Commissioning a ready-made loop: costs, timelines, and what to brief
When you need licenced loopable assets reliably and quickly, a marketplace shortens delivery and removes the licensing guesswork. Brief clearly and ask for a master plus platform variants in writing.
What to include in the brief:
- Track BPM and stems (see professional stem preparation for quality expectations)
- Desired loop lengths (1, 2, or 4 bars) and aspect ratios
- Style references and colour direction
- Deliverable list: ProRes master, H.264 vertical, Spotify Canvas variant (3–8 seconds)
- Required commercial licence terms: territory, ad use, streaming, derivative works
| Route | Typical cost range | Turnaround |
|---|---|---|
| DIY (your time) | Editor’s hourly rate × 2–8 hours | Same day to 3 days |
| Templated Canvas (marketplace) | £50–£150 per asset | 24–72 hours |
| Custom short-form package | £150–£500 | 3–10 business days |
| Full bespoke long-form with revisions | £500–£2,000+ | 1–3 weeks |
Rights, licences, and UK release checks for commercial use
Confirm you hold the necessary sync and master-use licences, clear any samples and third-party imagery, and hold a written commercial licence covering distribution territories and ad use before you publish anything.
Licence checklist:
- Confirm ownership or licence for the master recording and composition
- Clear any sampled audio or visual elements
- Secure model and property releases for featured people and locations
- Confirm usage terms cover ads, streaming, physical, and derivative works
- Keep copies of all release forms in the project folder
UK-specific notes: Consider PPL and PRS implications for public performance and streaming receipts if the video will appear in monetised contexts. This article is general information, not legal advice. Confirm current requirements with a qualified music industry solicitor or the relevant collecting society for your specific situation.
How Musicvideomarketplace handles loopable videos
Musicvideomarketplace offers ready-made and customisable loopable videos with clear commercial licences, platform variants, and delivery suited for UK commercial release. A content release strategy is worth planning before you order so you know exactly which formats you need.
Client journey:
- Choose a ready-made asset or request customisation
- Upload your audio and brief (BPM, stems, branding, style references)
- Receive a draft for approval
- Receive master plus platform variants and a written commercial licence
Typical deliverables: ProRes master, H.264 vertical and landscape files, a Spotify Canvas variant where requested, and a licence document specifying territory and permitted use-cases.
Audio looping integration for musicians’ videos
Audio and video loops must share the same bar length or the sync will drift visibly over repeated cycles. Export your audio loop from your DAW at the same sample rate as your video project (typically 48 kHz for video delivery). Trim the audio loop precisely on the downbeat, not on a fade, so the seam is inaudible. For ambient or instrumental tracks, a short crossfade on the audio seam (20–50 ms) blends the join without audible click. For tracks with a hard transient on bar one, a clean cut is usually preferable to a fade.
Syncing video loops with live performance or audio tracks
For live performance, the safest approach is to trigger video loops from a MIDI-synced media server or a DJ software layer that locks to your master clock. Map each loop to a whole-bar duration so a late trigger lands on the next downbeat rather than mid-phrase. Keep a separate “safety” version of each loop at double length (two cycles pre-rendered) so a missed trigger does not leave a black screen. For studio playback sync, export your video with a SMPTE timecode burn-in track during QA, then strip it for delivery. That gives you a frame-accurate reference if sync issues appear during mastering or broadcast.
Key takeaways
Seamless looping videos for musicians come down to three disciplines: tempo-aware planning, beat-precise editing, and platform-correct export.
| Point | Details |
|---|---|
| Plan for overlapping action | Storyboard so the last frame leads visually into the first, helping to hide the loop transition smoothly. |
| Lock loops to whole bars | At 120 BPM, use 2 s, 4 s, or 8 s durations; off-grid lengths make edits feel unresolved. |
| Edit to downbeat markers | Snap trims to beat markers in your NLE; apply a 50–100 ms crossfade only if a seam remains. |
| Export lossless, then repack | Save a ProRes or DNxHR master before creating platform-specific variants. |
| Musicvideomarketplace for ready-made loops | Order a Canvas and social bundle with a commercial licence and platform-ready files when time or editing skills are limited. |
What actually works for musicians making loops in 2026
The conventional wisdom says “just crossfade the seam.” That advice skips the part that actually matters: if the motion phase between the last frame and the first frame is wrong, no crossfade will save it. The crossfade is a patch, not a fix.
Tempo-aware loops sized to whole bars, with subtle abstract motion, consistently outperform narrative clips on Spotify Canvas. A slow colour wash or a continuous particle drift loops without the viewer ever noticing the join. A story that resets every six seconds just feels broken.
The other thing most guides understate: the brief matters as much as the edit. Whether you are cutting yourself or commissioning via a marketplace, a clear brief with BPM, bar lengths, aspect ratios, and licence requirements in writing saves more time than any software shortcut.
Ready-made and custom loopable videos from Musicvideomarketplace
If the workflow above sounds like more editing time than your release schedule allows, Musicvideomarketplace is the direct alternative. Rather than spending hours in Premiere Pro or DaVinci Resolve, you upload your audio, submit a brief with BPM, stems, and branding, and receive a Canvas-ready loop plus social variants with a written commercial licence covering UK distribution and ad use.

Turnaround for a templated Canvas asset typically runs 24–72 hours. Custom short-form packages with revisions land within 3–10 business days. Every order includes a ProRes master so you retain full control for future edits, re-licensing, or broadcast delivery.
Browse ready-made music videos at Musicvideomarketplace, choose a ready-made or custom option, and upload your audio and brief to get started.
Recommended
- Cómo crear un video musical paso a paso en 2026 | Music Video Marketplace Blog
- Examples of video content for musicians in 2026 | Music Video Marketplace Blog
- How to create long-form music video tutorials on YouTube | Music Video Marketplace Blog
- Videoerstellung Schritt für Schritt für Musiker 2026 | Music Video Marketplace Blog
Read next
 How to create song visuals: a 2026 guideLearn how to create song visuals in this 2026 guide. Engage listeners with stunning animations and boost your music's reach effectively!
 How to storyboard song videos: a practical guideMaster how to storyboard song videos to save time and costs. Create a clear, effective plan that boosts your music video production today!
 How to write music video scripts: a practical guideLearn how to write music video scripts that transform songs into visual stories. Master the art of crafting compelling AV scripts today!
 How to add visual effects to song videosDiscover how to add visual effects to song videos using industry-standard tools. Enhance viewer engagement and elevate your music visuals.
Turn the idea into a finished music video.
Drop your track into the Studio and build your visual in minutes.