
Stock footage in music videos: a creator's guide
Discover the ultimate guide to using stock footage in music videos. Transform your projects with stunning visuals and expert tips for seamless integration.
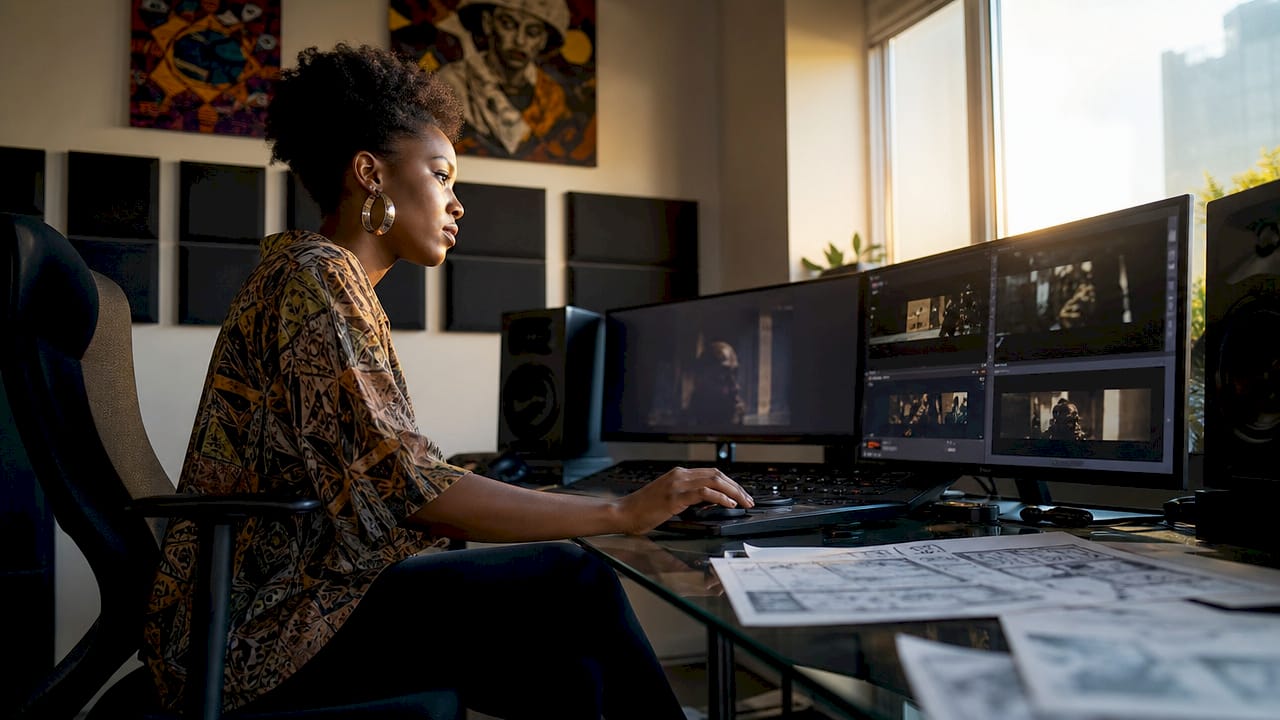
Stock footage in music videos: a creator’s guide
TL;DR:
- Stock footage is a cost-effective way for musicians and video creators to enhance their videos with supplementary visuals.
- The key to successful use is matching visual elements like color, movement, and resolution to original footage before editing.
- Consistent audio design and rhythmic cuts help blend clips seamlessly, creating a professional and cohesive music video.
Stock footage is pre-recorded video licensed for use in new productions, and it is one of the most cost-effective tools available to musicians and video creators working with limited budgets. A well-placed B-roll clip of a city at night or a slow-motion wave can transform a static performance video into a cinematic narrative. The challenge is not finding stock clips. It is blending them so viewers feel the story flow rather than notice the seams. This guide to using stock footage in music videos covers every stage, from technical preparation through to post-production, so you can build a polished, professional result without a full production crew.
What does a guide to using stock footage in music videos actually cover?
Stock footage integration is the practice of weaving licensed clips into original footage to extend a visual narrative without reshooting. The term B-roll, borrowed from broadcast production, describes any supplementary footage that supports the main action. In music video production, B-roll carries enormous weight. It sets mood, illustrates lyrics, and fills gaps between performance shots. Visual consistency is the primary safeguard of authenticity, and matching camera movement and colour tone prevents jarring disconnects that pull viewers out of the experience.
The benefits are real and practical. Stock footage removes the need to organise additional shoots for cutaway scenes, location shots, or abstract visuals. A musician shooting a bedroom performance can add aerial city footage, archival street scenes, or nature time-lapses without leaving the studio. The creative flexibility this offers is significant, particularly for independent artists who need compelling visuals to support a YouTube ad campaign or a single release.
What technical preparation do you need before adding stock footage?
Getting the technical groundwork right before you touch the timeline saves hours of rework later. Matching technical specs such as resolution, frame rate, and aspect ratio before colour grading ensures footage blends without quality degradation. If your original footage is 4K at 25fps, searching for stock clips at 1080p and 30fps will create visible inconsistencies the moment you cut between them.
Start by auditing your original footage across these key dimensions:
- Resolution and frame rate. Confirm your original clips’ resolution and frame rate before searching. Mixing 4K originals with 1080p stock requires careful cropping and upscaling to avoid quality loss.
- Aspect ratio. Most music videos target 16:9 for YouTube. Verify all stock clips share this ratio or allow safe cropping without losing key visual elements.
- Colour profile. Log footage and standard colour profiles behave differently in grading. Know which profile your camera used so you can match stock clips accordingly.
- Camera movement style. Handheld, gimbal-stabilised, and locked-off shots each have a distinct feel. Mixing them without intention creates visual noise.
Stock footage libraries offer multiple formats including HD MP4, 4K MP4, 4K HQ MOV, and RAW. Downloading ungraded RAW clips allows custom grading for a better match, but this requires editing software capable of handling RAW colour workflows such as DaVinci Resolve or Adobe Premiere Pro.
Pro Tip: Define your video’s visual mood board before opening any stock library. A single reference image that captures the lighting, colour palette, and energy of your video will make every search faster and every clip decision clearer.

How do you search for stock footage that matches your original content?
The most common mistake creators make is searching with generic keywords. Typing “city night” returns thousands of clips with nothing in common except the subject matter. Effective stock footage tips centre on cinematic descriptors rather than subject nouns.
- Lead with mood and lighting. Search terms like “warm bokeh street dusk” or “cold overcast industrial” will return clips that match your colour temperature and emotional register far more reliably than “street” or “factory.”
- Specify camera style. Add terms like “handheld,” “slow motion,” “drone,” or “locked off” to filter by movement style. This is the single fastest way to eliminate clips that will clash with your original footage.
- Evaluate for flexibility. Prioritise clips with extra headroom, clean backgrounds, and multiple angles. These give you room to reframe, add text overlays, and reuse clips across different scenes without repetition becoming obvious.
- Check colour temperature. Warm-toned originals paired with cool-toned stock footage create an immediate visual disconnect. Use your editing software’s colour scopes to compare before committing to a clip.
- Watch for stock video signals. Visual mismatch signals include obvious studio lighting, branded props, unnatural acting, and overly smooth camera movement. Any of these will break the viewer’s immersion and reveal the clip’s origin.
Successful stock footage integration is achieved by focusing on consistent visual DNA rather than chasing the “perfect” clip. A slightly imperfect clip that shares your video’s colour temperature and camera energy will always cut better than a technically superior clip that lives in a different visual world.
What editing techniques blend stock footage into a music video?
Post-production is where stock footage either disappears into the narrative or announces itself as foreign material. The goal is to make every clip feel intentional. These techniques are the foundation of professional stock video editing.
- Colour grading as visual glue. Colour grading stock clips to align with your original footage palette and adding grain or texture unifies disparate clips visually. Apply a base correction to every clip first, then use a single colour grade across the entire timeline to create cohesion.
- Grain and texture overlay. Adding a consistent film grain layer over the entire sequence, both original and stock footage, is one of the most effective ways to make everything feel like it came from the same camera.
- Motion matching. If your original footage uses a slow push-in, apply a subtle digital zoom or speed ramp to stock clips to mirror that movement. Editors in DaVinci Resolve and Adobe Premiere Pro can achieve this with keyframed position changes.
- Rhythmic cutting. Cutting footage on the beat or at emotional peaks increases viewer engagement and masks source differences. Place your edit points on snare hits, chord changes, or lyrical emphasis points.
- Sound design as the invisible thread. Stock footage is usually silent or carries unusable audio. Adding ambient sounds, room tone, and foley effects creates a continuous audio bed that ties clips together. A consistent ambient layer under the music prevents the jarring silence that exposes a cut.
- Transitions with purpose. Match cuts, light leaks, and motion blur transitions work well between stock and original clips because they use movement or light to mask the join rather than drawing attention to it.
Pro Tip: Export a rough cut with only the stock clips visible, no original footage, and watch it back. If the clips feel coherent on their own, they will integrate well. If they feel random, the problem is selection, not editing.
| Technique | Purpose | Tool example |
|---|---|---|
| Colour grading | Unify palette across all clips | DaVinci Resolve, Adobe Premiere Pro |
| Film grain overlay | Create visual consistency | After Effects, DaVinci Resolve |
| Rhythmic cutting | Align edits to music beats | Any NLE timeline |
| Ambient audio bed | Mask audio gaps from stock clips | Adobe Audition, DaVinci Fairlight |
| Motion matching | Mirror camera movement style | Keyframe tools in any NLE |
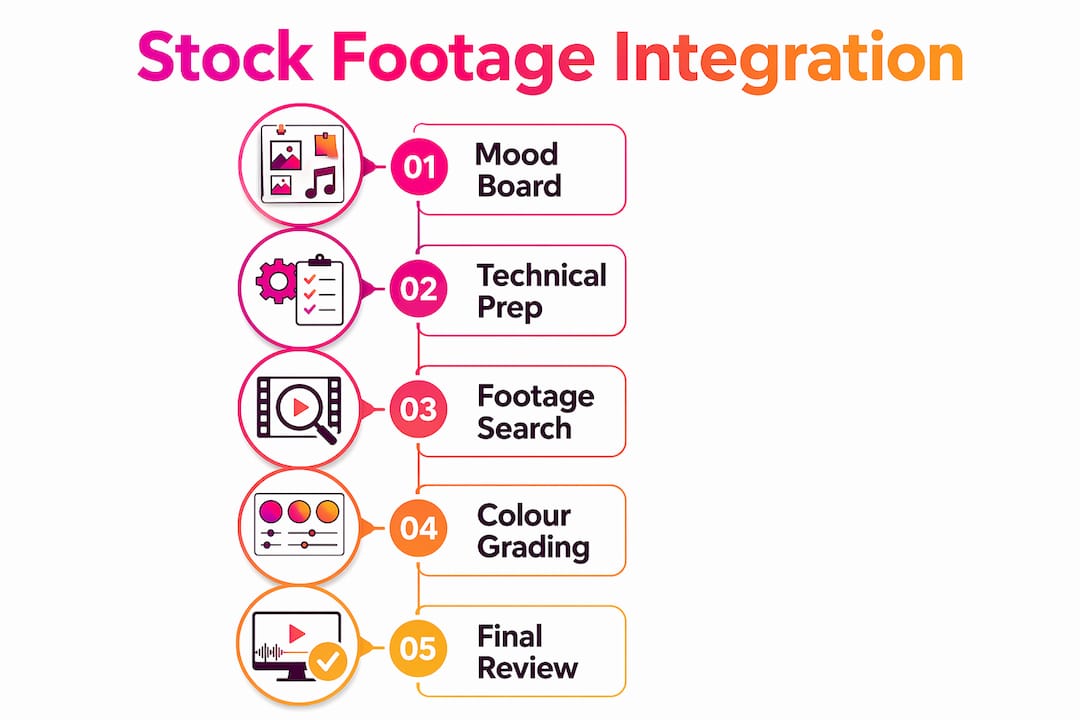
What are the most common challenges when using stock footage in music videos?
Even experienced creators run into predictable problems. Knowing them in advance means you can avoid them rather than fix them in the grade.
- Visual inconsistency. Warm, handheld original footage cut against cool-toned, perfectly stable drone stock footage breaks immersion immediately. The solution is to audit every clip against your original footage before placing it on the timeline, not after.
- Overuse of stock footage. Stock clips work as support, not as the main event. A music video that is predominantly stock footage loses the artist’s identity. Keep original performance footage as the anchor and use stock clips to expand the world around it.
- Resolution and frame rate mismatches. Upscaling 1080p stock to sit alongside 4K originals creates softness that is visible on large screens. Where possible, source stock clips at the same resolution as your originals.
- Audio gaps and jarring silences. Sound design drives emotion more than visuals in many cases. Lowering music during dialogue, adding ambient room tone, and avoiding abrupt silences all enhance narrative flow. Build a consistent audio bed before you finalise any edit.
- Licensing and copyright. Always verify the licence terms of every clip before publishing. Royalty-free does not always mean free to use commercially. Check whether the licence covers YouTube monetisation and paid advertising, particularly if you plan to run an ad campaign for your release.
Key takeaways
Successful stock footage integration depends on matching visual DNA across colour, movement, and sound before a single edit is made.
| Point | Details |
|---|---|
| Match technical specs first | Align resolution, frame rate, and colour profile before selecting any stock clip. |
| Search with cinematic descriptors | Use mood, lighting, and camera style terms rather than generic subject keywords. |
| Colour grade the full timeline | Apply a single grade across all clips to create visual cohesion across the sequence. |
| Cut rhythmically to the music | Place edit points on beats or emotional peaks to mask source differences naturally. |
| Build a continuous audio bed | Add ambient sound and room tone under every stock clip to prevent jarring silences. |
Why visual consistency matters more than clip quality
The biggest mistake I see musicians and video creators make is prioritising clip quality over visual compatibility. A 4K clip with perfect exposure means nothing if its colour temperature is three stops cooler than everything else in the timeline. Viewers do not consciously notice colour temperature. They just feel that something is off, and that feeling erodes trust in the video.
Sound design is the part most creators underestimate. I have watched rough cuts where the visuals were nearly perfect, but every stock clip arrived with a dead audio track and no ambient replacement. The silence under the music was more distracting than any colour mismatch. Building an audio bed, even a subtle one, is not optional. It is the difference between a video that feels produced and one that feels assembled.
The creative opportunity in stock footage is real. A musician with a single camera and a small budget can build a visual storytelling world that rivals videos made with full production crews, provided the integration is disciplined. The discipline is not technical. It is editorial. Every clip you place should serve the song. If you cannot explain why a clip is there in one sentence, it probably should not be there.
Rhythmic editing is the technique that ties everything together. Cutting on the beat is not a trick. It is a form of respect for the music. When the edit and the song move together, viewers stop watching and start feeling. That is the goal.
— Music
Build your music video with Musicvideomarketplace
Musicvideomarketplace gives musicians and video creators access to curated 4K stock footage built specifically for music video production. Every clip in the library is selected for cinematic quality, colour flexibility, and licensing clarity, so you can focus on the creative work rather than the legal paperwork.

Whether you are building your first video or scaling up your YouTube ad campaign, Musicvideomarketplace makes it possible to go from song to finished music video in minutes. The platform handles the technical side so you can focus on the story. Visit Musicvideomarketplace to start your next project with the right footage from the first frame.
FAQ
What is stock footage in music video production?
Stock footage is pre-recorded, licensed video used to supplement original clips in a production. In music videos, it typically serves as B-roll to set mood, illustrate lyrics, or fill visual gaps between performance shots.
How do I make stock footage look like it belongs in my video?
Match colour temperature, camera movement style, and resolution to your original footage, then apply a single colour grade across the entire timeline. Adding a consistent film grain overlay across all clips is one of the fastest ways to create visual unity.
What technical specs should stock footage match?
Stock clips should match your original footage in resolution, frame rate, and aspect ratio. Mixing 4K originals with 1080p stock requires upscaling that can reduce visible quality, particularly on large screens.
How much stock footage is too much in a music video?
Stock footage works best as support for original performance content. When stock clips begin to outnumber original shots, the artist’s identity weakens and the video loses its personal quality. Use stock footage to expand the world of the video, not to replace the artist within it.
Do I need to check licensing before using stock footage on YouTube?
Yes. Royalty-free licences vary widely. Always confirm that your chosen licence covers commercial use and YouTube monetisation before publishing, especially if you plan to run a paid ad campaign alongside the video.
Recommended
- Creative video content ideas for producers: boost music promotion | Music Video Marketplace Blog
- How to storyboard song videos: a practical guide | Music Video Marketplace Blog
- Understanding copyright in music videos: a 2026 guide | Music Video Marketplace Blog
- Your Music Release Campaign Process For Maximum Impact | Music Video Marketplace Blog
Read next
 Stock Footage vs Custom Video for Your Music ReleaseStock footage, custom video or a ready-made music video? Compare cost, speed, licensing and YouTube fit to choose the right visuals for your next release.
 Storytelling in Music Videos: Boost Viewer Retention by 40%Discover how storytelling in music videos increases viewer retention by 40% and sharing by 30%. Proven techniques for independent musicians to boost engagement in 2026.
 Title Safe Music Video: Finding “Safe” and Framing Your OwnLooking for the “Safe” music video? Find the right one, tell official videos from lyric videos, and learn how to keep your own titles safe on screen.
 SRT Captions for a Music Video: How to Make and Upload ThemLearn how to write an SRT caption file for a music video: the exact format, how to time lyrics, caption instrumentals, fix errors and upload to YouTube.
Turn the idea into a finished music video.
Drop your track into the Studio and build your visual in minutes.